
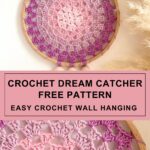
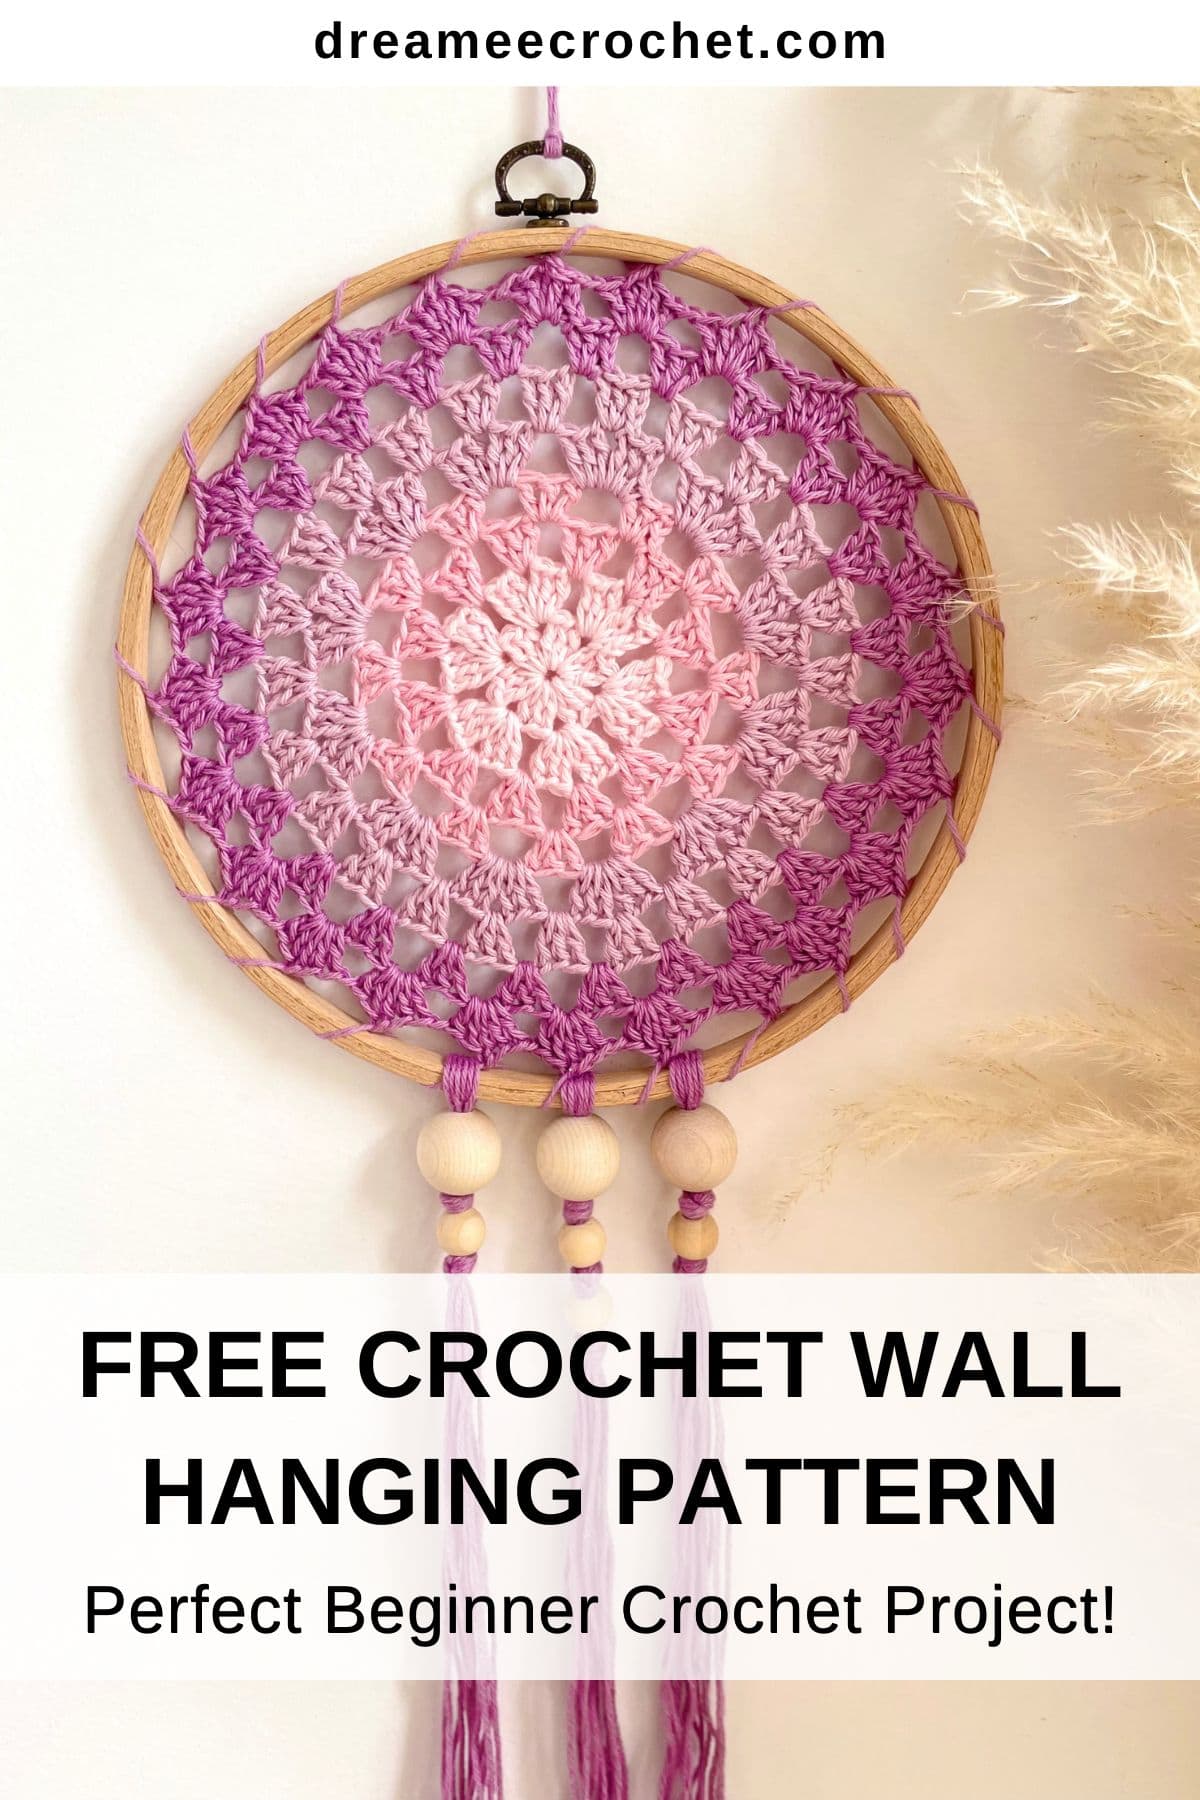
If you’ve been on the hunt for some crochet wall hanging décor ideas, I’ve got just the thing for you. This crochet dream catcher free pattern is super easy and honestly so fun to make. Don’t worry if you’re new to this because I’ll show you exactly how to make this crocheted dream catcher with just a few simple stitches.
This would make a gorgeous DIY crochet wall hanging for your bedroom, craft nook or even as a handmade gift for a friend or family to keep their bad dreams at bay.

If you want to learn how to crochet a dreamcatcher that is super simple to make and looks very stylish then you must try this free crochet dream catcher pattern because it is about to become one of your favorite projects.
Scroll down to view the full written pattern. Or purchase the ad-free printable PDF on Etsy or Ravelry.
This blog post contains affiliate links, which means that if you choose to make a purchase, I will earn a small commission. This commission comes at no additional cost to you. If you do make a purchase through my affiliate link, I want to thank you for supporting this blog!
Crochet Dream Catcher Free Pattern: Before You Get Started
Pattern Notes
Skill level: this is an easy project so it is suitable for a beginner crocheter
Finished size: this will depend on what size of the wooden ring you will be using. I used a
wooden ring that is 19cm (7.5″) in diameter (outer edges)
Terminology: US crochet terminology
Gauge: not important as you can stretch (or block if you wish) the dreamcatcher to size
Sizing
I used a wooden ring that is 19cm (7.5″) in diameter (outer edges). But you can easily customise the size of the dream catcher by crocheting more or less rounds.
– to make a smaller sized dreamcatcher, simply crochet less rounds
– to make the piece larger to fit a bigger wooden ring, add more rounds after R7 but pay attention to which rounds have single clusters (a cluster of 3x DC) and which rounds have double clusters (a cluster of 3xDC, CH1, 3xDC) – see below for instructions but this will make more sense once you start making the dream catcher
- R1: single clusters
- R2: double clusters
- R3: single clusters
- R4: single clusters
- R5: double clusters
- R6: single clusters
- R7: single clusters
- R8: double clusters
- R9: single clusters
- R10: single clusters
- R11: double clusters
- And so on making sure you always have two rounds of single clusters followed by one round of double clusters
- Last round: crochet as per R8 in this pattern but it has to follow a round of single
cluster
Yarn Requirements
This crochet dream catcher free pattern is a great pattern to use up your scrap yarn stash. It will work with the below yarns:
- Superfine/Fingering #1 = 3 ply
- Fine/Sport #2 = 4 ply
- Light Worsted #3 = DK
- 100% cotton
- 100% acrylic
- a blend of cotton and other fibre such as acrylic or bamboo
I used the below yarn to make the crocheted dream catcher:
- Superfine/Fingering yarn (#1 = 3 ply)
- 100% cotton yarn
- Hobbii Baby Cotton Organic – baby pink (12), light rose (11), pastel purple (13), purple (14)
Yardage – when using Superfine/Fingering yarn (#1 = 3 ply) and a 3.5mm (E-4)
crochet hook:
- Color A = baby pink: cca 1.5g = 5.1m (5.6yds)
- Color B = light rose: cca 2g = 6.8m (7.5yds)
- Color C = pastel purple: cca 4g = 13.6m (14.9yds)
- Color D = purple: cca 5g = 17m (18.6yds)
Yarn Substitutes
US Suppliers
- Blend of cotton and acrylic – Sport #2 – YarnArt Jeans
- 100% cotton – DK #3 – WeCrochet Animation DK
UK Suppliers
- Blend of cotton and acrylic – Sport #2 – YarnArt Jeans
- 100% cotton – DK #3 – Paintbox Yarns Cotton DK
Equipment
- crochet hook size: 3.5mm crochet hook or E-4 when using Superfine/Fingering yarn (#1 = 3 ply) – refer to the instructions on your yarn label if using different weight of yarn
- scissors
- yarn needle/tapestry needle
- measuring tape
- stitch marker
- wooden ring or embroidery hoop
- wooden beads or other material for decorating
Crochet Abbreviations Used
This crochet wall hanging pattern is written using basic crochet stitches in US terms. Download this free printable chart with UK terms.
– MR: magic ring/magic circle – watch this step by step video tutorial on How to crochet a magic ring
– ST: stitch
– DC: double crochet stitch
– CH: chain
– STR CH: starting chain
– SL ST: slip stitch
– INV FO: invisible fasten off
– (…..) x 6: repeat the pattern inside the brackets by the indicated number of times (in this example, repeat the pattern in the brackets 6 times)
– {…}: number shown inside these brackets equals the stitch counts at the end of each round
How Can I Download this Crochet Dreamcatcher Pattern?
My free crochet patterns are supported by ads on this website and are not downloadable.
But you can download the ad-free and printable pdf pattern for a small fee from my Etsy shop or Ravelry store. Your generous contribution will help towards the cost of materials and running this website so I can continue to publish my free patterns online for everyone to enjoy.
Ad-Free PDF Download
Purchase the printable ad-free PDF pattern packed with detailed instructions and helpful step-by-step photos.
I Need Help with this Pattern
If it is your first time dipping your toes in the world of crochet, then you may find these video tutorials handy before you get started with this free crochet pattern.
Need more help?
The fastest way to get help is to leave your question in the comment box at the bottom of this post.
Or join our Dreamee Crochet Facebook group to ask for support with this free crochet wall art pattern. Many of the members have experience with my patterns and will be more than happy to help.
You can also share your creations, chat to fellow crochet makers or exchange tips and tricks.
Join Our Community
Join our Dreamee Crochet community on Facebook and ask for support, share your creations and exchange tips with fellow crochet makers.
Crochet Dream Catcher Free Pattern: Step by Step Instructions
Construction
- You will crochet the dream catcher in rounds starting from the middle until you have achieved the desired size.
- You will join each round by slip stitching into the top chain of the starting chain.
- You can easily adjust the size by crocheting less or more rounds.
- You will be using basic crochet stitches – slip stitches and double crochet stitches
- You can follow the below guide on specific color changes or you can choose different colors and combinations
Planning to sell on Etsy?
Take advantage of this AMAZING OFFER! Open an Etsy shop by clicking on the button below and list your first 40 items FREE!
Color Changes
- Color A = baby pink (12) – R1 to R2 (2 rounds)
- Color B = light rose (11) – R3 to R4 (2 rounds)
- Color C = pastel purple (13) – R5 to R6 (2 rounds)
- Color D = purple (14) – R7 to R8 (2 rounds)
Written Pattern
I have written the first few rounds without using abbreviations so it is easier for you to follow this crochet dream catcher free pattern.
R1 (color A):
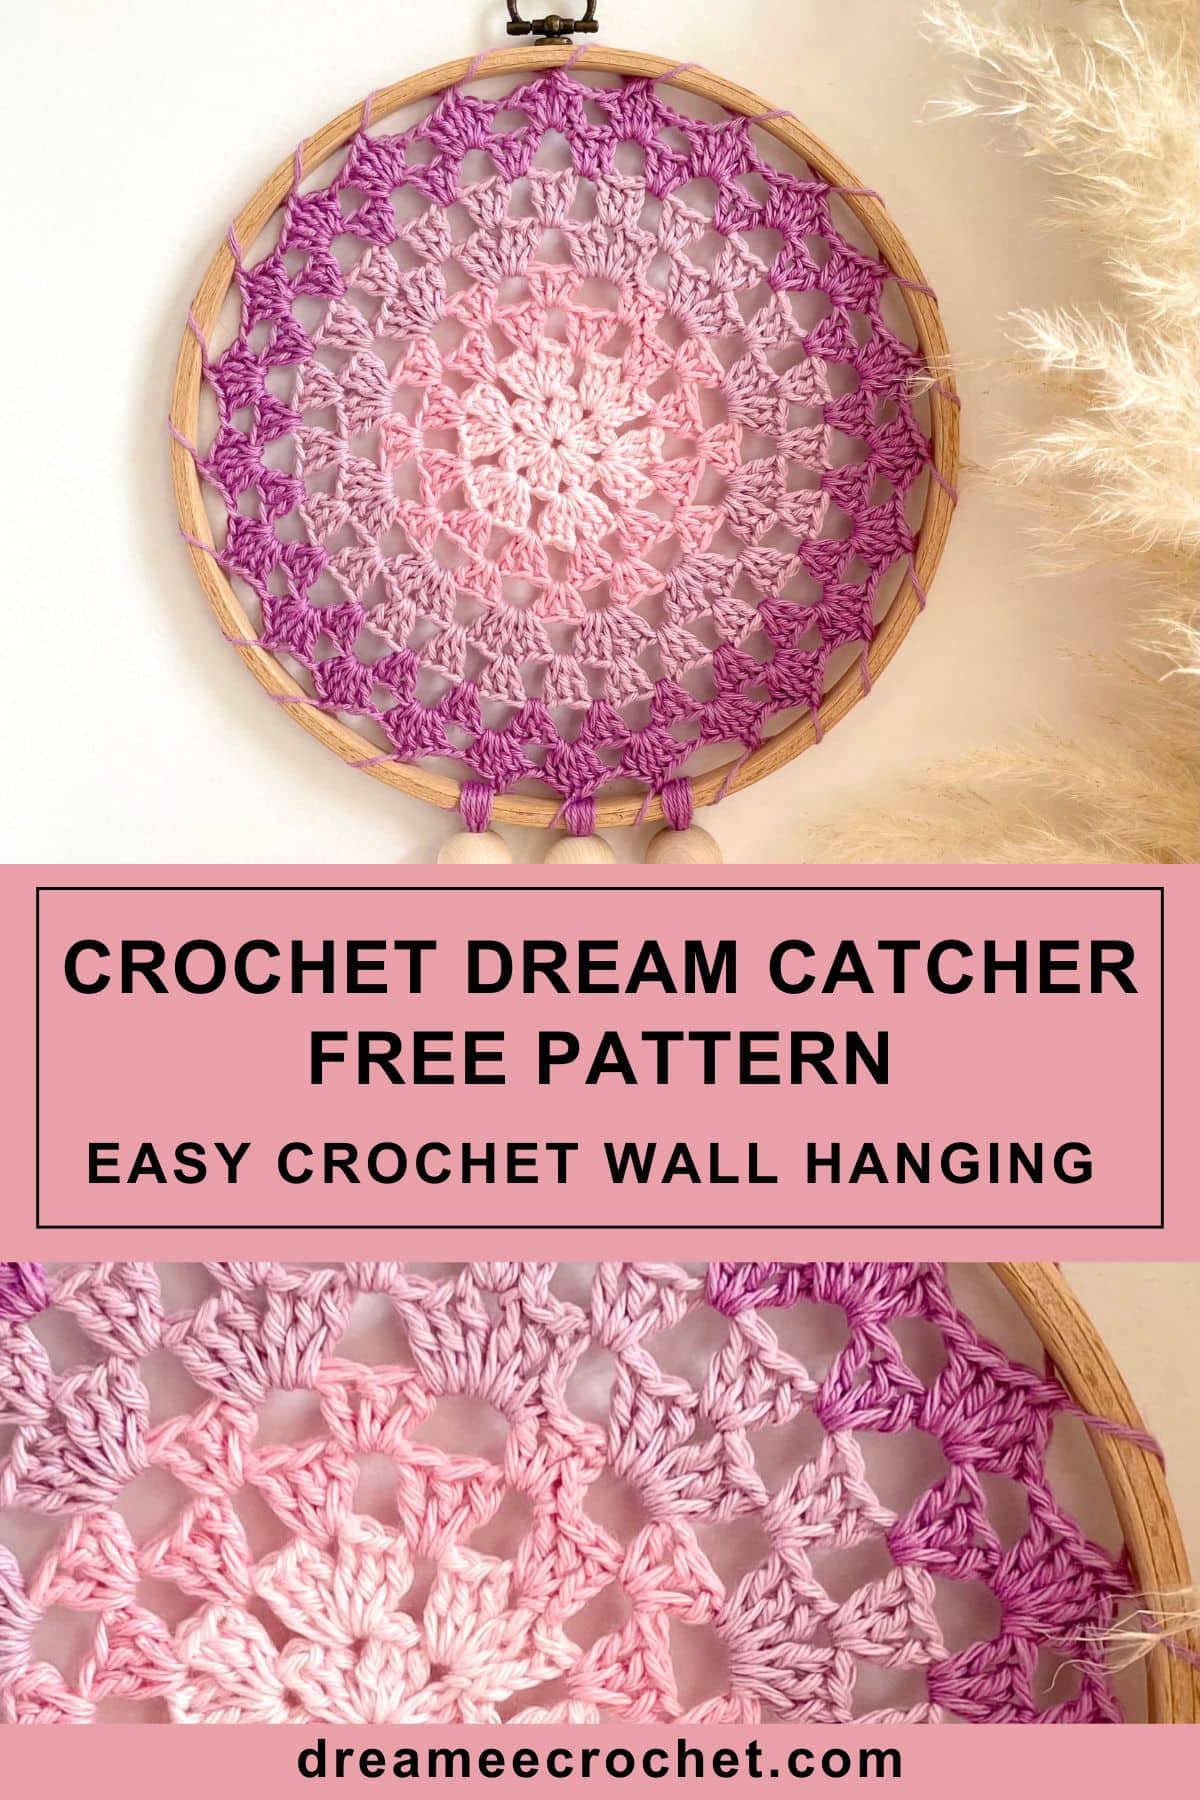
- magic ring – chain 3 – this is your starting chain that will count as your first double crochet stitch – video tutorial on How to crochet a magic ring
- 2x double crochet into the ring, chain 1 (Pic 1)
- (3x double crochet into the ring, chain 1) – repeat 5 times
- slip stitch into 3rd chain of the starting chain (Pic 2)
- at the end of the first round you will have a circle with 6 clusters and chain 1 space between them (cluster = 3 double crochet stitches) – in the photo the chain 1 spaces are not very visible because the stitches are close to each other
- {24 including the slip stitch}
R2 (color A):
- slip stitch in the next two stitches and the chain 1 space between the clusters (Pic 3)
- chain 3 – this is your starting chain in this round
- 2x double crochet into the chain 1 space, chain 1, 3x double crochet into the same chain 1 space, chain 1
- (3x double crochet into the next chain 1 space, chain 1, 3x double crochet into the same chain 1 space, chain 1) – repeat 5 times
- slip stitch into 3rd chain of the starting chain
- at the end of this round you will have a circle with 6 sets of 2x clusters and chain 1 space between them (Pic 4)
- {48 including the slip stitch}
- don’t worry if you work is all twisted at this stage, this is normal and your work will flatten out as you crochet along and then stretch it onto the wooden ring

R3 (color B):
- slip stitch in the next two stitches with color A and then slip stitch into the chain 1 space between the clusters with color B
- chain 3 – this is your starting chain in this round
- 2x double crochet into the chain 1 space, chain 1
- (3x double crochet into the next chain 1 space, chain 1) – repeat 11 times
- slip stitch into 3rd chain of the starting chain
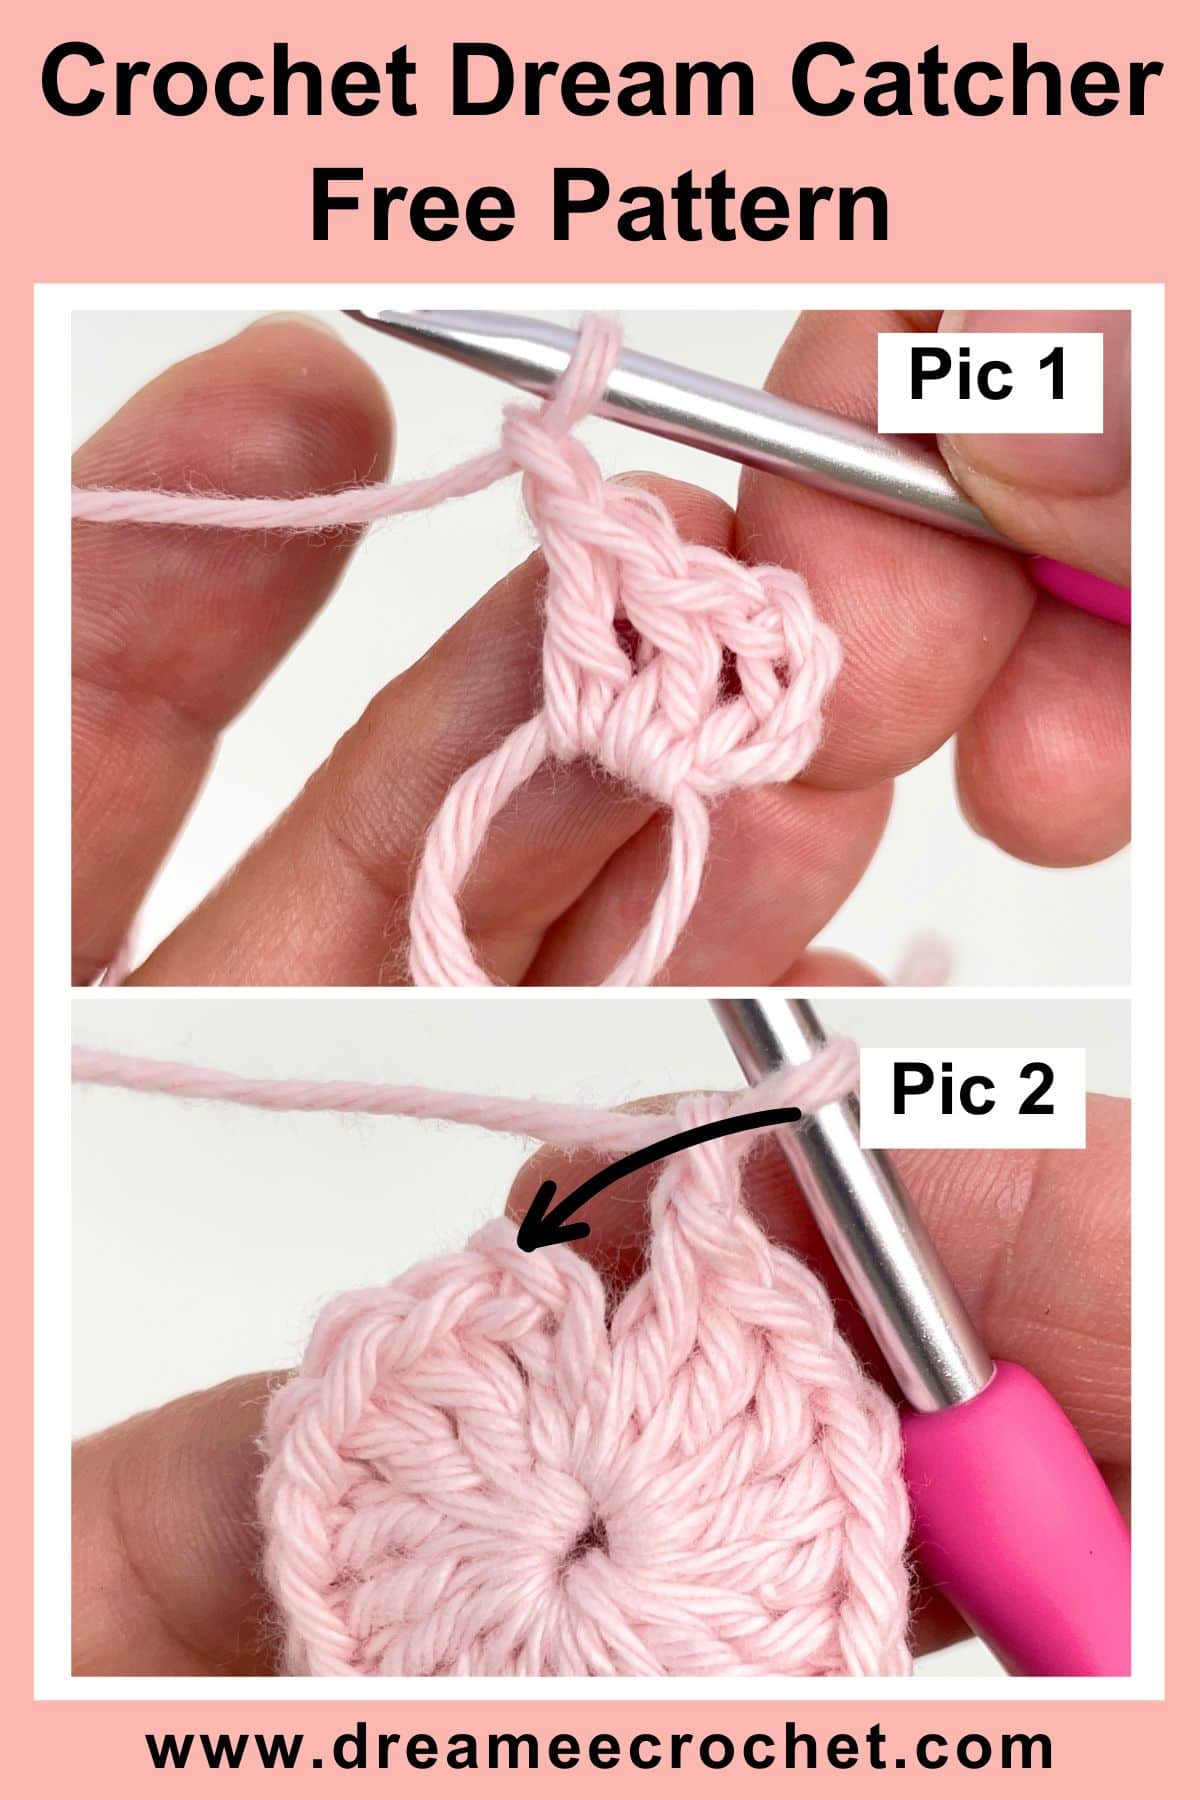
- at the end of this round you will have a circle with 12 clusters and chain 1 space between them (Pic 5)
- {48 including the slip stitch}
R4 (color B):
- slip stitch in the next two stitches and the chain 1 space between the clusters
- chain 3 – this is your starting chain in this round
- 2x double crochet into the chain 1 space, chain 1
- (3x double crochet into the next chain 1 space, chain 1) – repeat 11 times
- slip stitch into 3rd chain of the starting chain
- at the end of this round you will have a circle with 12 clusters and chain 1 space between them (Pic 6)
- {48 including the slip stitch}
I will now use abbreviations from R5 onwards so please refer to the list of abbreviations at the beginning of this pattern.
R5 (color C):
- SL ST in the next 2 STs with color B and then SL ST into the CH1 space between the clusters with color C
- CH 3x – this is your starting chain in this round
- 2x DC into the CH1 space, CH 1x, 3x DC into the same CH1 space, CH 1x
- (3x DC into the next CH1 space, CH 1x, 3x DC into the same CH1 space, CH 1x) x 11
- SL ST into 3rd CH of the STR CH
- at the end of this round you will have a circle with 12 sets of 2x clusters and CH1 space between them (Pic 7)
- {96 including the slip stitch}
R6 (color C):
- SL ST in the next 2 STs and the CH1 space between the clusters
- CH 3x – this is your starting chain in this round
- 2x DC into the CH1 space, CH 1x
- (3x DC into the next CH1 space, CH 1x) x 23
- SL ST into 3rd CH of the STR CH
- at the end of this round you will have a circle with 24 clusters and CH1 space between them (Pic 8)
- {96 including the slip stitch}
R7 (color D):
- SL ST in the next 2 STs with color C and then SL ST into the CH1 space between the
clusters with color D - CH 3x – this is your starting chain in this round
- 2x DC into the CH1 space, CH 1x
- (3x DC into the next CH1 space, CH 1x) x 23
- SL ST into 3rd CH of the STR CH
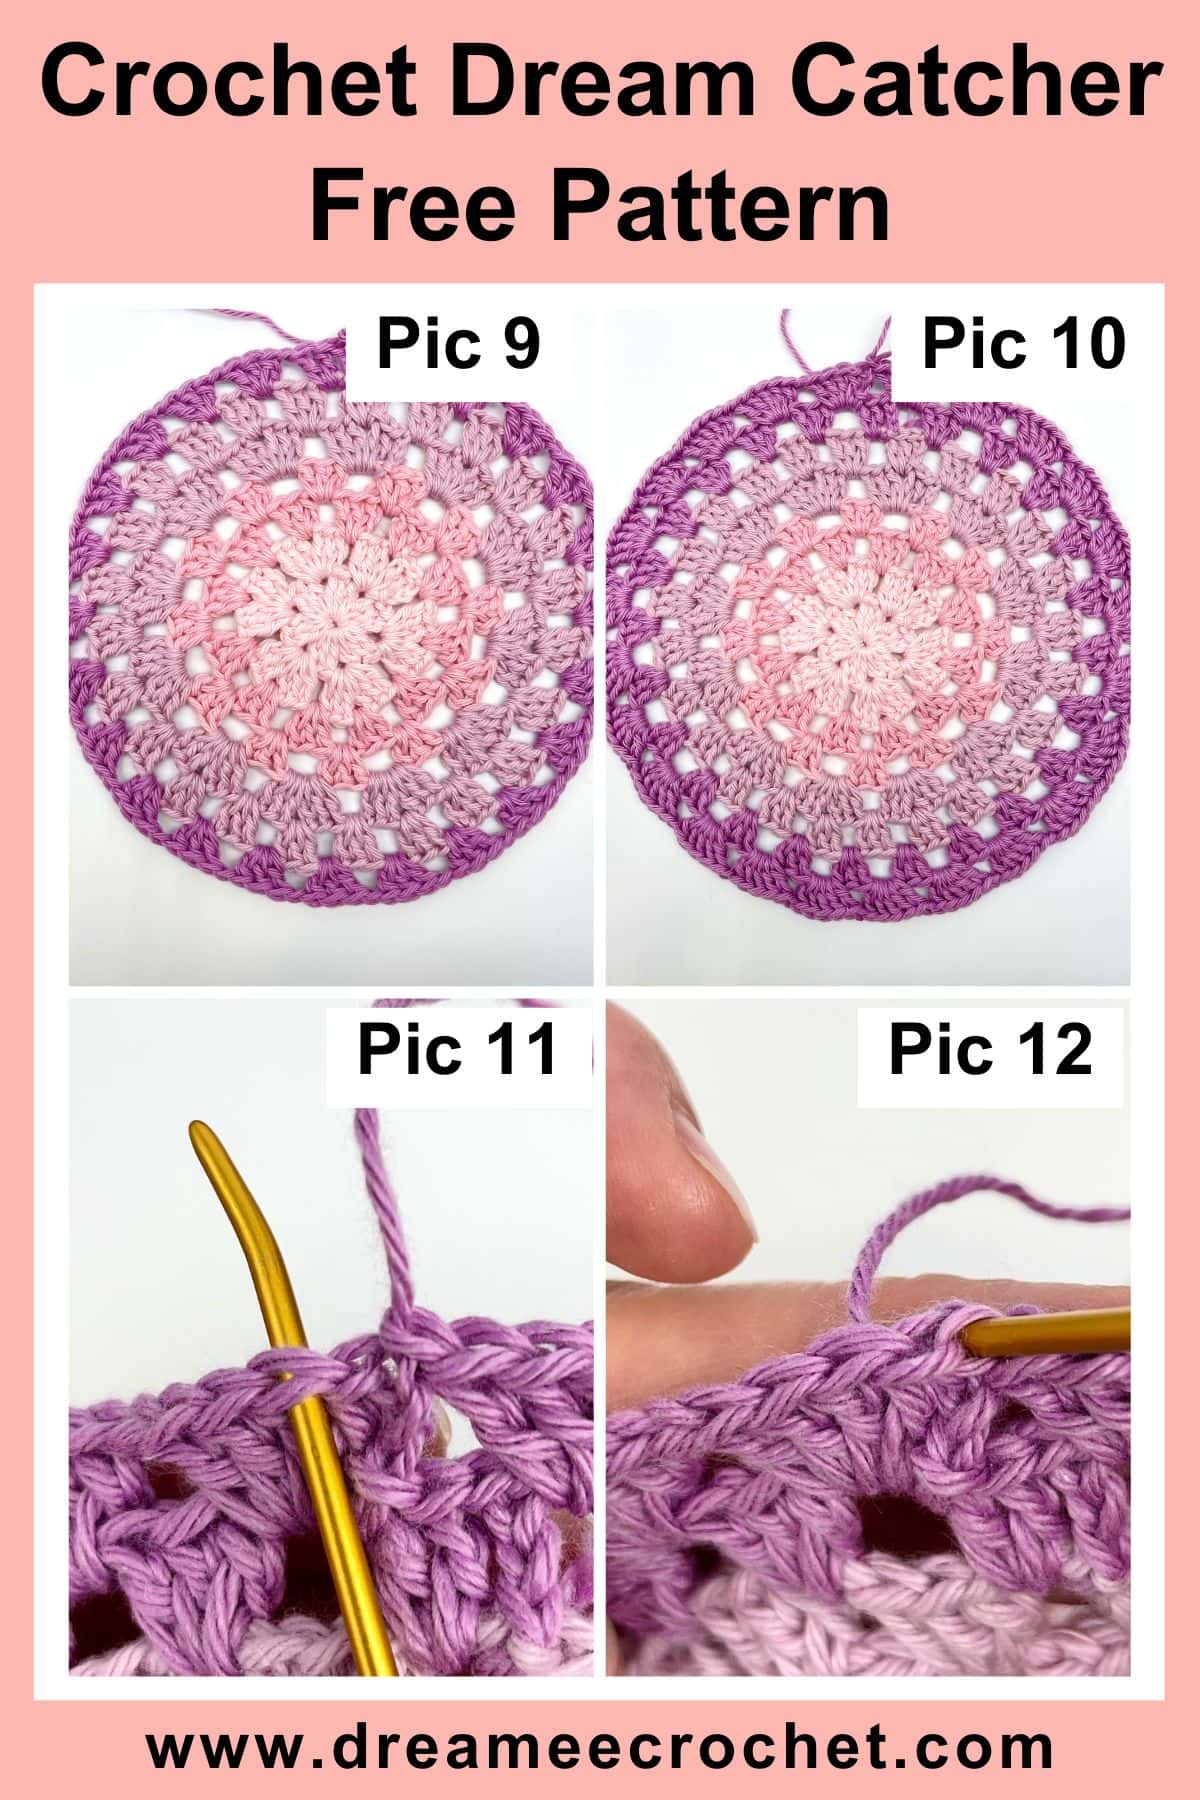
- at the end of this round you will have a circle with 24 clusters and CH1 space between them (Pic 9)
- {96 including the slip stitch}
R8 (color D) – last round:
- SL ST in the next 2 STs and the CH1 space between the clusters
- CH 3x – this is your starting chain in this round
- 4x DC into the CH1 space, CH 1x
- (5x DC into the next CH1 space, CH 1x) x 23
- SL ST into 3rd CH of the STR CH
- at the end of this round you will have a circle with 24 clusters and CH1 space between them (cluster = 5x DC) (Pic 10)
- {144 including the slip stitch}
- INV FO (Pic 11 & 12) and leave a very long tail for attaching the work to the wooden ring – video tutorial on How to crochet invisible fasten off
- you can now also weave all the yarn tails in
How to Attach Your Dreamcatcher to the Wooden Ring
Step 1: after you INV FO, weave the yarn tail into your work and come out through the middle stitch in the 5x DC cluster (doesn’t matter which cluster) (Pic 13)
Step 2: your piece should be smaller than the wooden ring to allow for stretching – I have a gap of about 1.25cm (0.5″) between the piece and the ring (Pic 14)
Step 3: thread your yarn needle with the yarn tail, wrap the yarn tail around the wooden ring and insert your yarn needle into the middle stitch of the next cluster (Pic 15)
Step 4: continue wrapping the yarn tail around the wooden ring while pulling the yarn through the middle stitch of each cluster (Pic 16)
Step 5: your piece should be nicely stretched once it is attached all around the ring
Step 6: once you have gone all around the ring, insert your needle back into the middle of the first cluster where you started and tie a double knot on the wrong side of the dreamcatcher
Step 7: weave the yarn tail in or create a hanging loop with it

And now all there is left to do is to decorate your dreamcatcher with tassels, feathers, ribbons or whatever material you prefer. The choice is yours! 🙂 I have attached 3 tassels with wooden beads. Here is a good video tutorial on How to create tassels with beads.
Did You Enjoy Making this Crochet Wall Hanging?
- Leave a comment: share your feedback with us in the comment box below
- Pin this pattern: pin this free pattern on Pinterest so you can return to it later
- Share your photos: I love to see your finished products so please share your photos on social media with the tag @dreameecrochet
- Share this pattern: show me your love and link to this pattern on all social media platforms
- Subscribe: subscribe to my Newsletter to receive news and updates when I publish new patterns and video tutorials
- Explore more: visit my free crochet patterns for more crochet projects you will love!
- Join our Dreamee Crochet Facebook group: share your makes, chat to fellow crocheters or exchange tips and tricks
You Need to Check These Out!
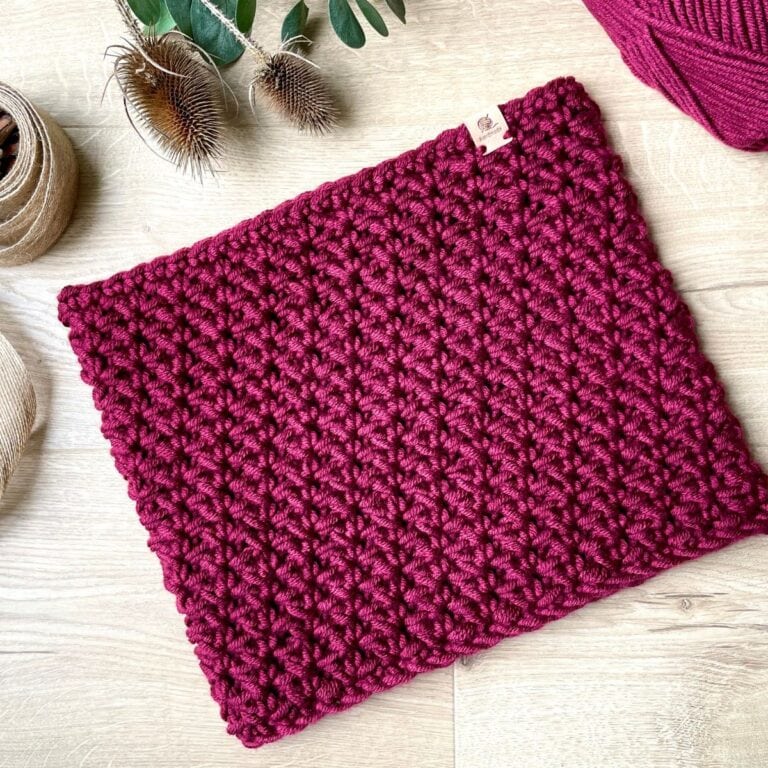
If you like this crochet wall decor pattern you may also enjoy these crochet home decor patterns. Or visit my free crochet patterns and video tutorials for more beautiful patterns and videos you will love!
Free Crochet Heart Pillow Pattern
Easy Crochet Mug Cozy: Free Pattern & Video Tutorial
Free Crochet Laptop Case Pattern
Happy crocheting! 🙂


Hello,
On the blog it says that the Ganny Crochet Dream Catcher is downloadable, I am not seeing a spot where to do this. Am I doing something wrong? Thanks for any help and the great pattern.
Hi, the dreamcatcher pattern is downloadable but you have to purchase it either from Etsy or Ravelry for a small fee. The free patterns are only available online.
Love, Petra x
I’m already signed up for your emails. One of your emails is how I found out about the blog hop. Why do I have to sign up for your emails again in order to receive the free pdf that I learned about in an email from you.
Hi Nefertiti,
When we run crochet blog hops there are many designers participating in the event and all these designers promote the blog hop on their social media and with their subscribers too. This means that there will be a large number of crocheters who are not subscribed to my Newsletter as yet. Unfortunately it is not possible to set this up in such way so the system would recognise who is already subscribed and who is not. As a result of this, I have to ask everyone to sign up in order to receive the free download.
Love,
Petra x